How to deploy a Hugo site to DigitalOcean automatically with Wercker
Getting Things Tech recently switched from WordPress to Hugo, the latter of which is a static website generator. Further, we moved our hosting over to DigitalOcean, which makes things very speedy. As we like to do, it’s time to look under the hood and show you how to deploy a Hugo site like this one to DigitalOcean painlessly, with Wercker.
Wercker is a service that helps with a variety of automation tasks, many of which are outside the scope and ability level of our typical readers. When you have a Hugo site, part of the publishing workflow is really easy: Building the site. But having the HTML files created and actually having your site on the web are two different things.
Hugo’s documentation has a page dedicated to deployment with Wercker, so be sure to check that out for extra information. The problem with that page is that it really only documents how to use it with Github Pages, which works well but isn’t for everyone. For instance, GTT uses Piwik for traffic analytics and therefore I need to have a server that can run PHP and SQL, which is why we use DigitalOcean.
This tutorial assumes you’re storing your Hugo site in a git repository hosted on Github or Bitbucket. For help with that, check out the Hugo documentation. The general workflow here will be that you will commit changes to the git repository, which then triggers Wercker to:
- Build your site
- Put the public HTML on your DigitalOcean server
Yep! Fairly simple. The starting point here was a how-to by Joseph Stahl, but Wercker has made some changes internally since that was posted.
Initial Wercker setup
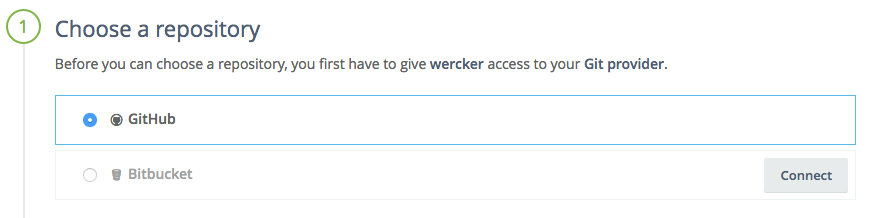
You will need to create a Wercker account, which can be done with your Github/Bitbucket account. Next, go to Create -> Application to get started. In the first step, you will need to choose the Github/Bitbucket repository to associate with the application. When you commit to this repository, it will trigger deployment. Choose your Hugo site’s repository here (create it if needed).
Create the application
In the next step, you will need to choose how Wercker accesses your repository. If it is a private repository, then you will need to choose the option selected in the image below, allowing Wercker to place a key in the repository for you. If it’s a public repository, you can choose to have Wercker do it without an SSH key.
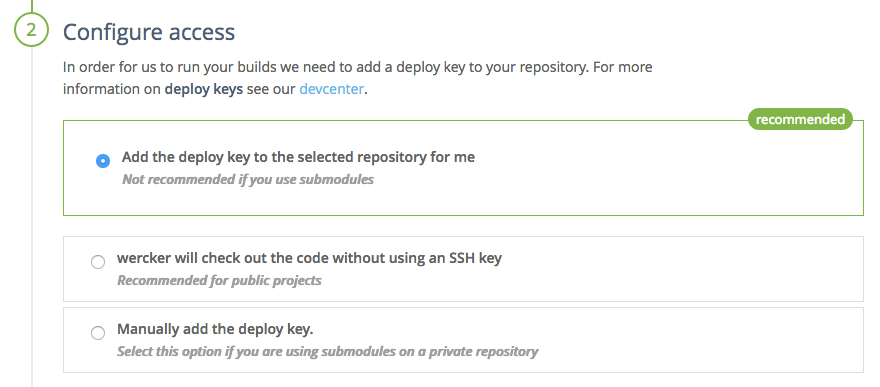
Now the application is created.
Generate key pair
Go to your application on Wercker, and then click on the “Environment” tab. There are three environment variables that you are interested in:
- WERCKER_PUBLIC
- WERCKER_PRIVATE
- HOSTNAME
At first, none will be there. Click “Generate SSH Keys” on the bottom right, as shown below:
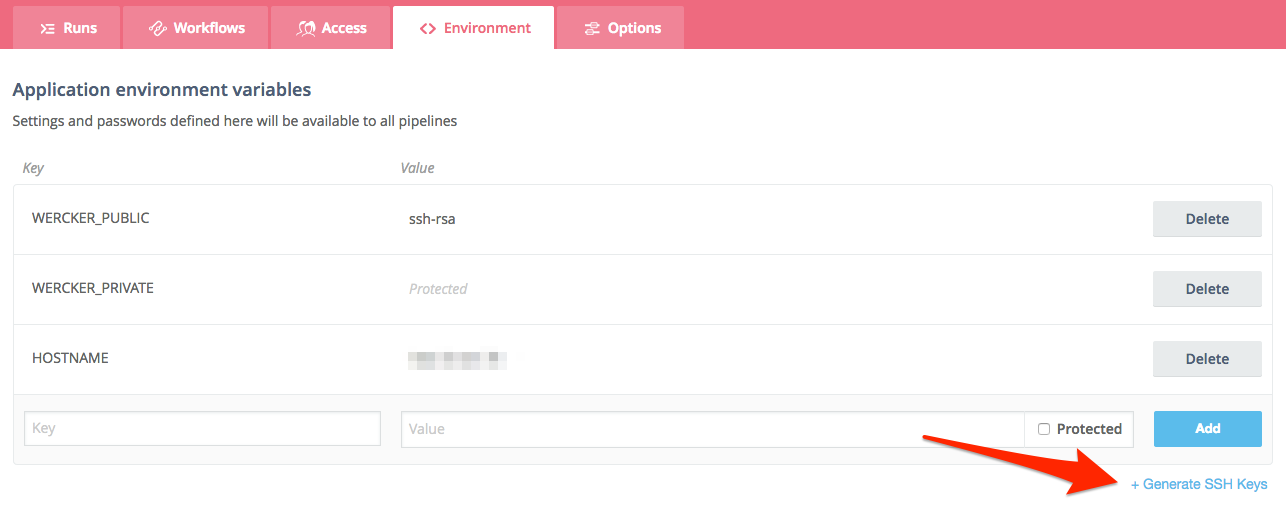
Click that, name the key “WERCKER” and leave the rest default. Generate the key. You will need to copy the public key to your DigitalOcean droplet, which is the next step. To get the public key on your clipboard, highlight the content of WERCKER_PUBLIC after generating your SSH key. See below to see what I’m talking about, though of course I’ve blurred the actual key.

Server setup
I am assuming your server is running nginx; I think you are most of the way there with these instructions when using Apache, but some adaptations would be needed. You should have public key authentication set up so that you can sign in without a password. If you haven’t yet set up your droplet, you should wait until creating your Wercker application so that you can add Wercker’s key to the droplet more easily.
If you haven’t created your DigitalOcean droplet
This is easy. Log into DigitalOcean, then go to your profile’s settings. In the security submenu, there is a heading called “SSH Keys.” Hit the “Add SSH Key” button. Copy the public key from Wercker here and name it whatever you want, probably “wercker.”

Now you can create your droplet and easily give access to Wercker.
If you already created your DigitalOcean droplet
You can add the Wercker key manually via the command line. Open your terminal app and enter ssh root@your-droplet-ip and log into your droplet. You now need to edit the /root/.ssh/authorized_keys file. One way to do this is to enter nano /root/.ssh/authorized_keys, which will bring up a file editor. Make a new line and paste the public key at the top of the file. Use the on-screen instructions to exit and save the file.
Create your Wercker file
The most useful info I have to offer you is a sample wercker.yml file to get you going. By putting this file in your Hugo site’s repository, you tell Wercker what to do whenever you make changes. Here is a step-by-step of what this file will do:
- Build the site with the
hugocommand in a virtualized operating system - SSH into your DigitalOcean droplet
- Transfer the newly-created Hugo files to your DigitalOcean droplet
- Reboot nginx to make sure the changes are made public.
To customize this wercker.yml, you will need a few pieces of information:
- A preferred version of Hugo. The current version as of this posting is 0.17, which I’ve left in the example file for you under
arjen/hugo-buildand afterversion:. - The name of your theme. This is on the next line, after
theme:. Whatever the name of your theme’s folder is in your repository, that’s what you should enter there. It won’t build if you don’t change it! - The IP address of your DigitalOcean droplet or your domain name. You can replace
$HOSTNAMEthroughout the file with this or you can add a parameter called HOSTNAME to your Wercker environment like we did with the SSH keys (but you don’t use the key generator, you just type it out yourself). - Your Hugo site’s root directory on the server. In other words, where are the files supposed to go? Your server may be configured to look in a specific place already; even if it isn’t, it will before the site is operational. Mine goes in
/var/www/blog, but many others will choose a different folder. You will need this on lines 24 and 25 where you currently seevar/www/blogandvar/www. Erase those and fill in the location of your website’s root directory.
Below is the Github Gist with this example file, but again remember that you will need to make the above changes for it to work. If you find any issues or have suggested changes, feel free to suggest them via Github.
Note that on line 7, you can add custom options to the hugo command, like telling it not to build your drafts (a good idea).
Set up Wercker workflow
Your last real step is telling Wercker explicitly what to do and when to do it. By default, it will know that you want to do the build step—that is, the part that basically just runs the hugo terminal command. But we need to deploy, too! So you need to go to the “workflows” tab in your Wercker app.
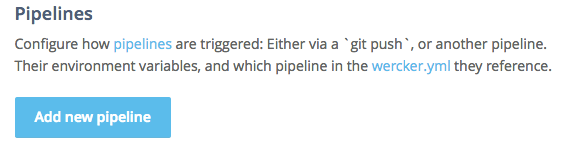
Scroll down and find the “add new pipeline” button, which you can see below.
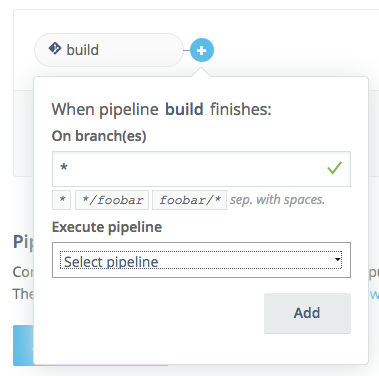
On the next page, fill it out as you see in the image below, naming the pipeline “deploy” and having it correspond to the “deploy” steps in your Wercker file.

Now navigate back to the “Workflows” tab where you started and click the + sign right next to the word “build.”
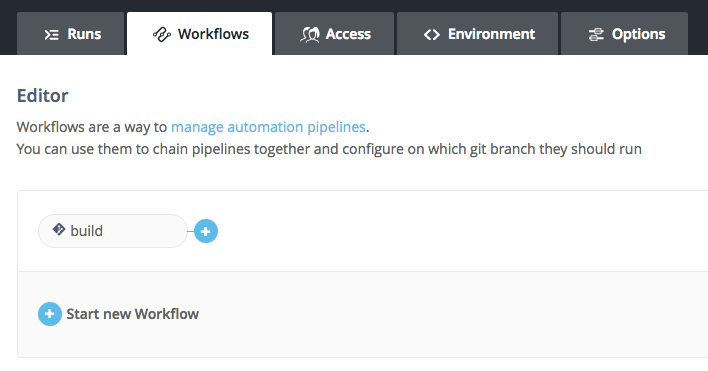
In the dropdown, choose deploy.
And that’s it! You’re ready.
Make sure it works
To test things out, commit a change to the repository and check the progress on Wercker. You can even get a button to put on your own website or on the Github/Bitbucket readme that shows the status of the latest build attempts. Here is GTT’s:
If you like something slimmer, they have this style as well:
You can generate these buttons from the options tab in your application on Wercker.
Oftentimes you will know right away why errors occur, but other times it can be a little more difficult to interpret the output. Keeping an eye on which step fails is key.